Ever needed to share your local dev server with a teammate for a quick review, test a webhook from a third-party service, or demo a work-in-progress app without deploying it first? Normally, this is a frustrating exercise. Your machine sits behind a router, a firewall, or a NAT, and there’s no straightforward way to reach it from the outside world.
This is exactly the problem Cloudflare Tunnel solves. Instead of opening ports or messing with your router settings, cloudflared (Cloudflare’s lightweight daemon) establishes an outbound-only connection from your machine to Cloudflare’s network. Cloudflare then routes incoming traffic from your custom domain straight to your localhost securely, and without exposing your IP address.
This article walks you through setting it all up from scratch.
Prerequisites
Before proceeding, make sure you have the following ready:
- A Cloudflare Account — Sign up for free at cloudflare.com if you don’t have one.
- A Custom Domain managed with Cloudflare DNS — You can purchase a domain from any registrar (Namecheap, GoDaddy, Porkbun, etc.) and then point its nameservers to Cloudflare. Follow Cloudflare’s official guide on changing nameservers to get this set up. The process typically takes a few minutes to a few hours to propagate.
Once those are in place, you’re ready to go.
Step 1: Log in to Cloudflare
Head to dash.cloudflare.com and log in to your account.
Step 2: Create a new Tunnel
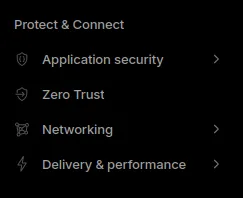
From the Cloudflare dashboard, navigate to Zero Trust → Networks → Connectors.
Note: You may be prompted to set up a Zero Trust organization name the first time you visit this section. It’s free — just pick any name for your team or project.
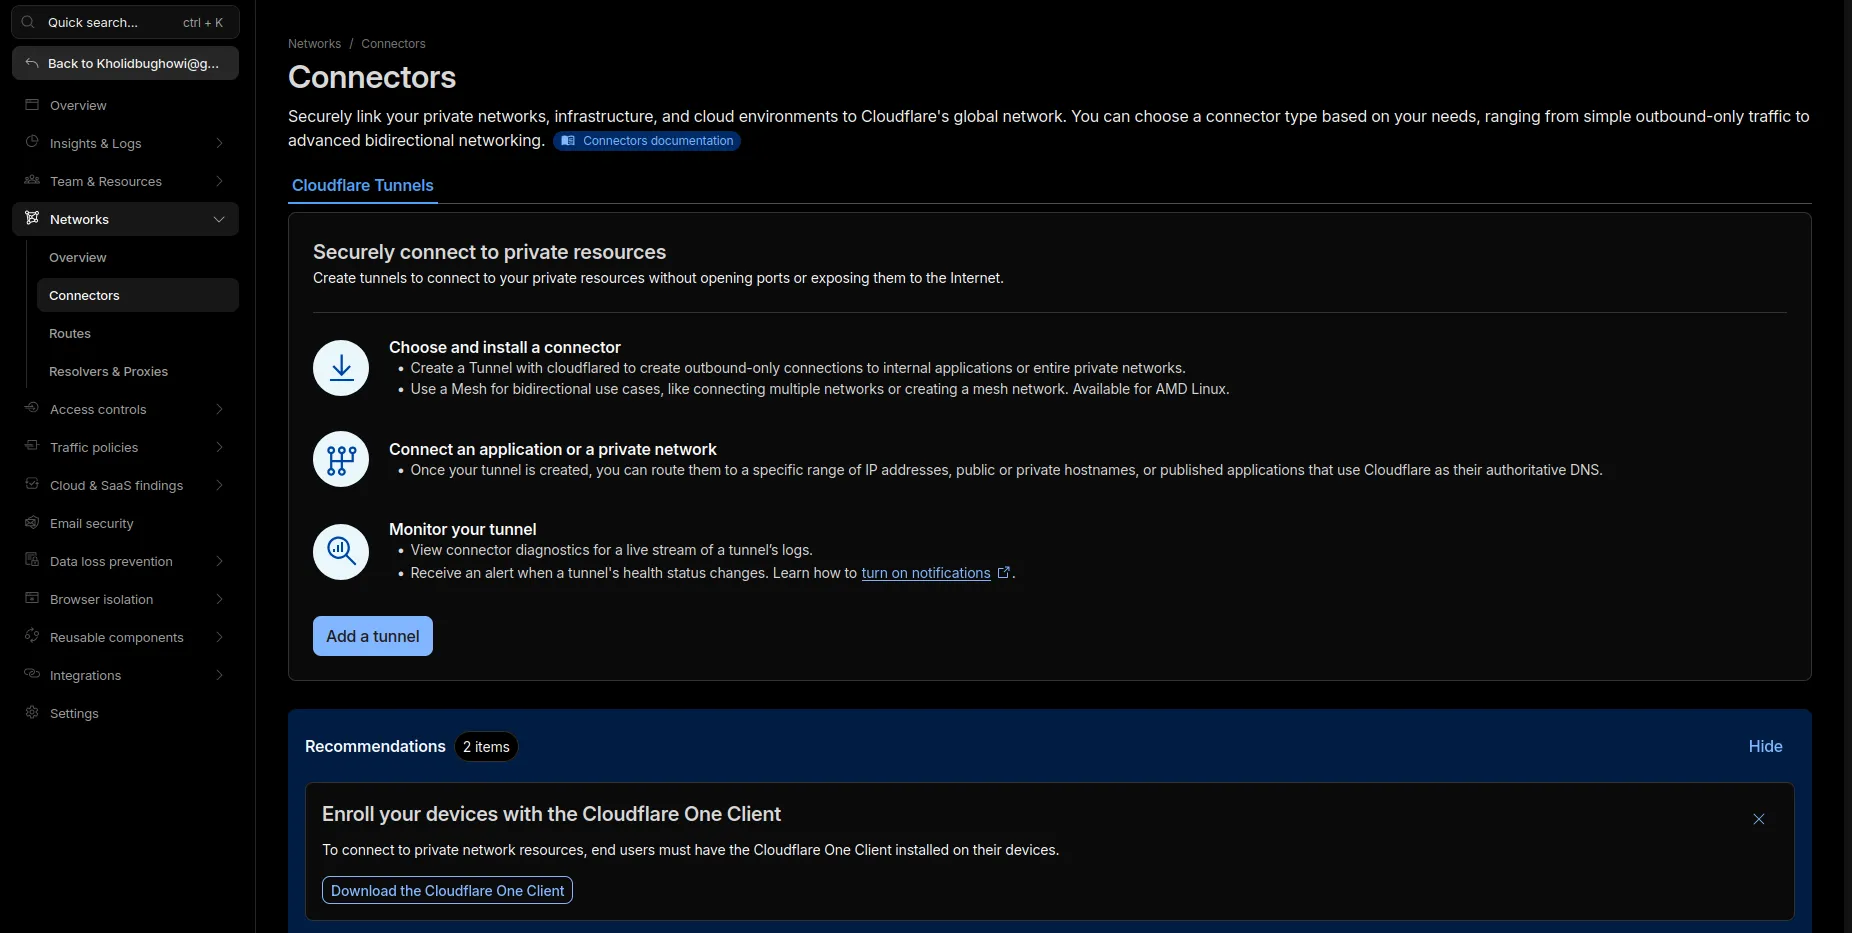
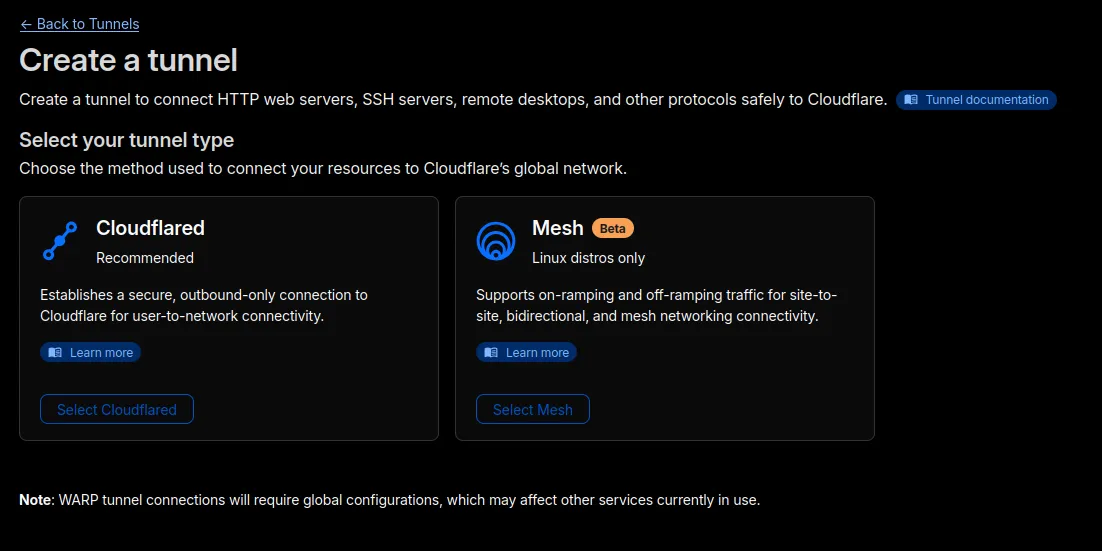
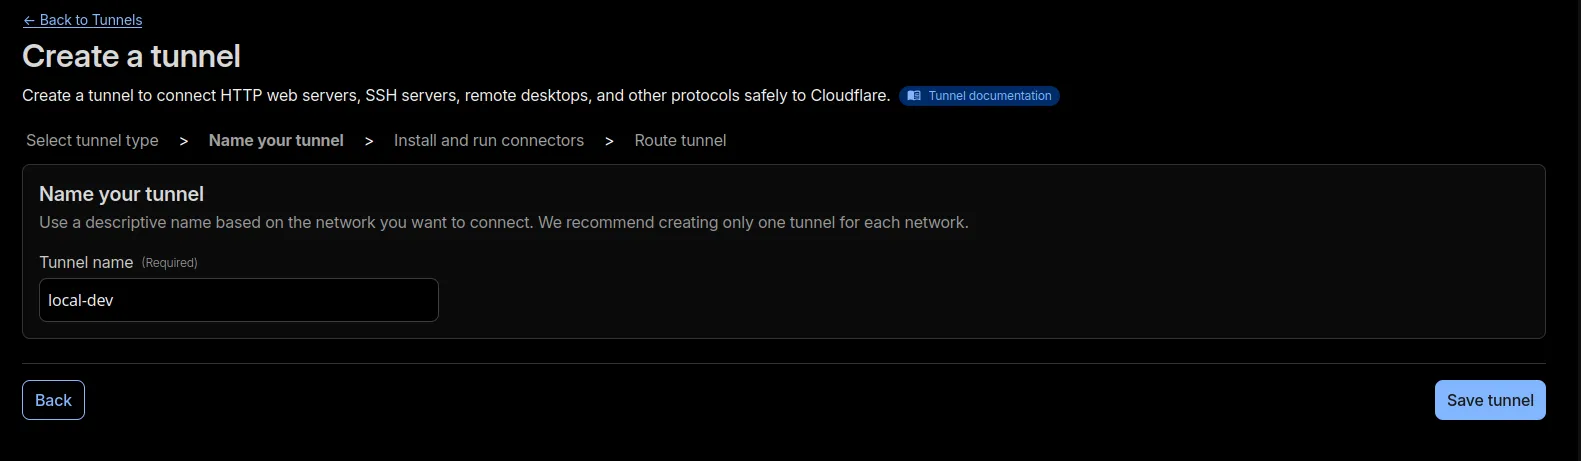
Click Add a tunnel. On the tunnel type selection screen, choose Cloudflared as the connector type. Give your tunnel a descriptive name (e.g., my-dev-tunnel or local-dev) so you can recognize it later, then click Save tunnel.
Step 3: Install cloudflared
Next, Cloudflare will display installation instructions for cloudflared, the daemon that runs on your machine and maintains the tunnel connection. Choose the method that matches your operating system and CPU architecture.
For example, on Debian 64-bit, the dashboard will give you a some commands to download and install the package. Run it in your terminal and wait for the installation to complete.
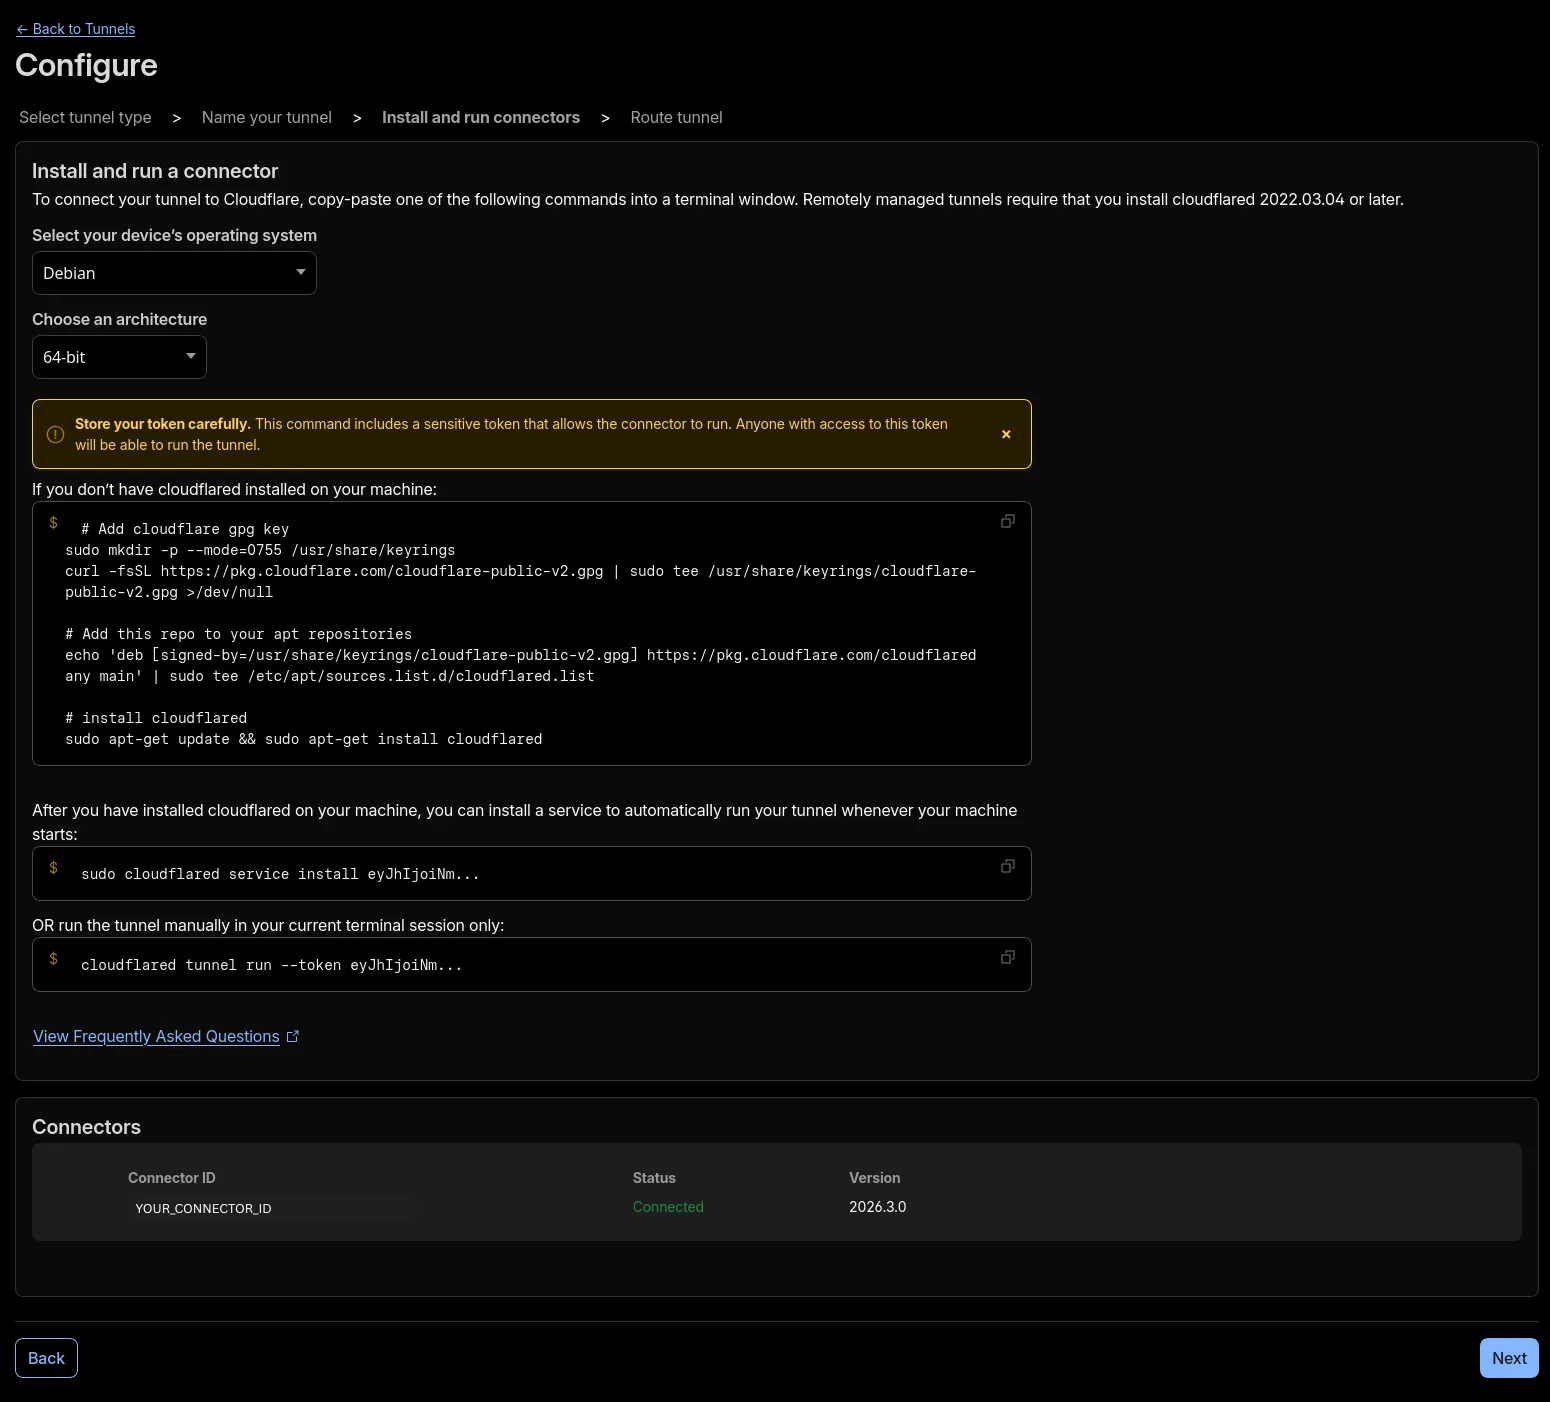
Once installed, you can verify everything worked by running:
cloudflared --versionYou should see the version number printed in your terminal.
Step 4: Run your tunnel
After installation, Cloudflare gives you two ways to run the tunnel:
Option A — Install as a system service: This registers cloudflared as a background service that starts automatically every time your machine boots. It runs silently in the background without any manual intervention.
Option B — Run in the current terminal session: This runs the tunnel only while your terminal window is open. Once you close it or press Ctrl+C, the tunnel stops immediately.
For most personal development machines, Option B (terminal session) is the better choice, and here’s why:
- Reduced attack surface. A system service runs continuously, even when you’re not actively using it. That means your localhost is technically reachable from the internet 24/7, even when your dev server isn’t running. Someone hitting your tunnel URL would get a connection error rather than your app, but the tunnel itself is still active and listening. Running it only when needed eliminates this exposure entirely.
- Intentional control. You know exactly when your localhost is public and when it isn’t. There’s no risk of forgetting it’s still running in the background after wrapping up for the day.
- Simpler cleanup. No need to manage a service, check its status, or remember to disable it. Close the terminal then it’s gone.
If you’re setting this up on a server or CI environment where you need the tunnel to persist reliably across reboots, a system service makes more sense. But for a local dev machine, running it per session is the safer and more deliberate approach.
To run the tunnel in your current session, use the command shown in the Cloudflare dashboard. It will look something like this:
cloudflared tunnel run --token <YOUR_TUNNEL_TOKEN>Keep this terminal window open while you’re using the tunnel.
Step 5: Configure public hostname routing
Now it’s time to tell Cloudflare where to route traffic. You’ll see two sections to fill in:
Hostname
Configure the subdomain, domain, and path for your public URL:
- Subdomain: e.g.,
dev,preview,demo - Domain: select your custom domain from the dropdown (e.g.,
yourdomain.com) - Path: leave this blank unless you want to expose only a specific path (e.g.,
/api)
For example, if you set the subdomain to dev and your domain is yourdomain.com, your tunnel will be accessible at https://dev.yourdomain.com.
Service
Configure how cloudflared should connect to your local app:
- Type: choose the protocol your local server uses (most commonly
HTTPorHTTPS) - URL: the address your app is running on locally (e.g.,
localhost:3000)
For example, if you’re running a TanStack Start dev server on port 3000, you’d select HTTP as the type and enter localhost:3000 as the URL.
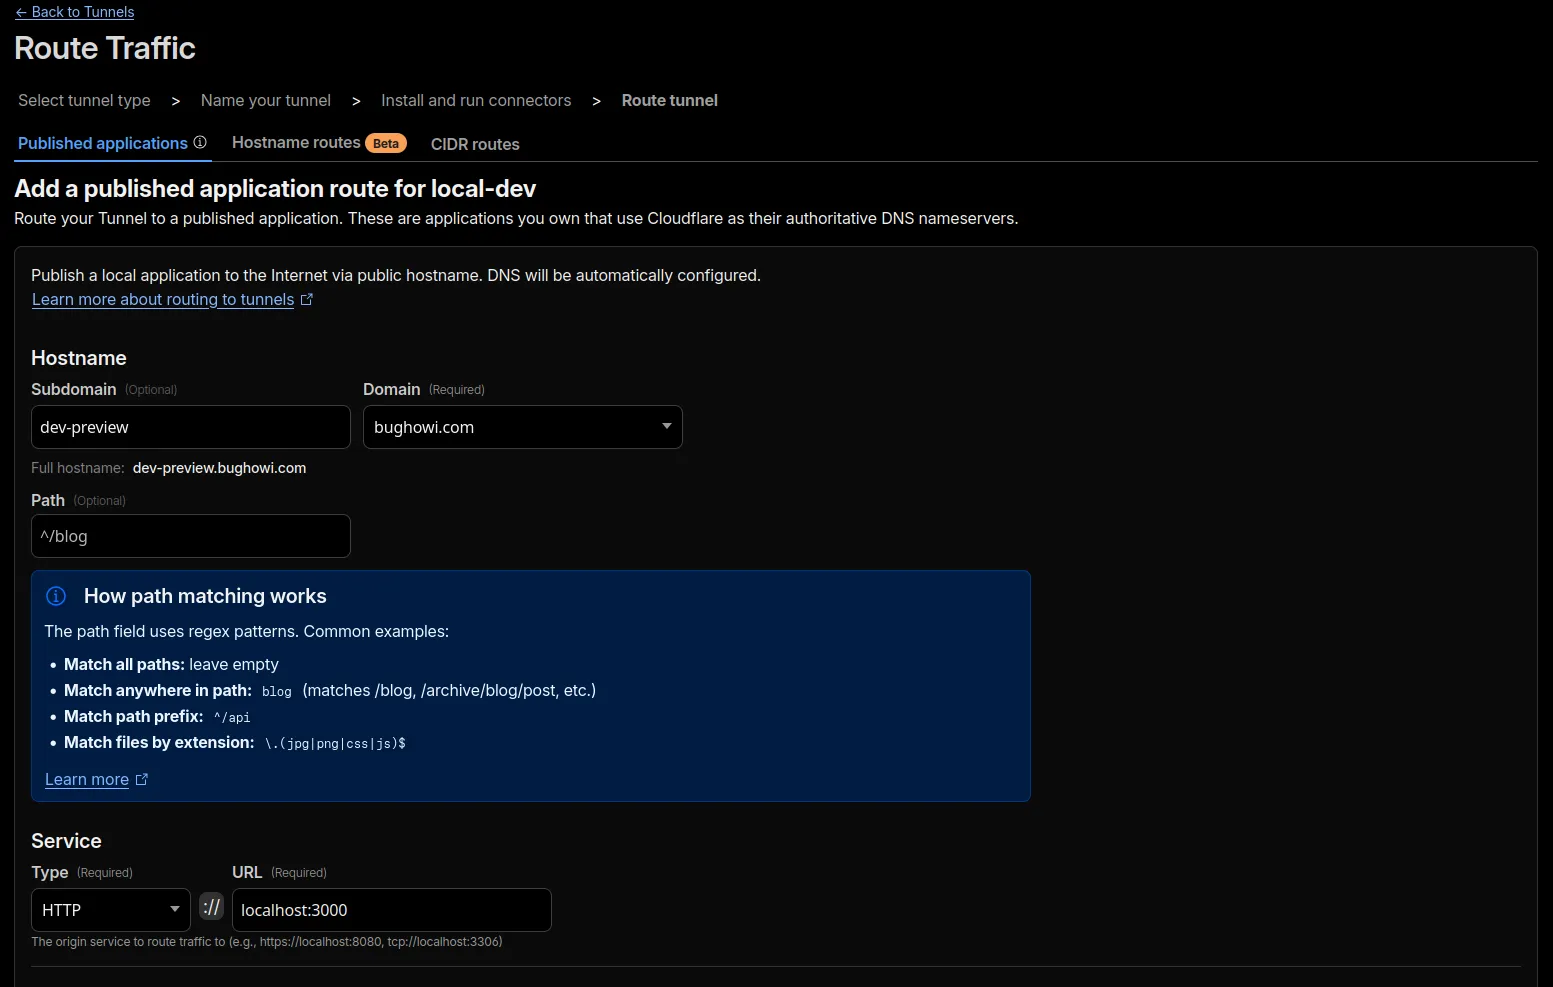
Once you’ve filled everything in click Complete Setup.
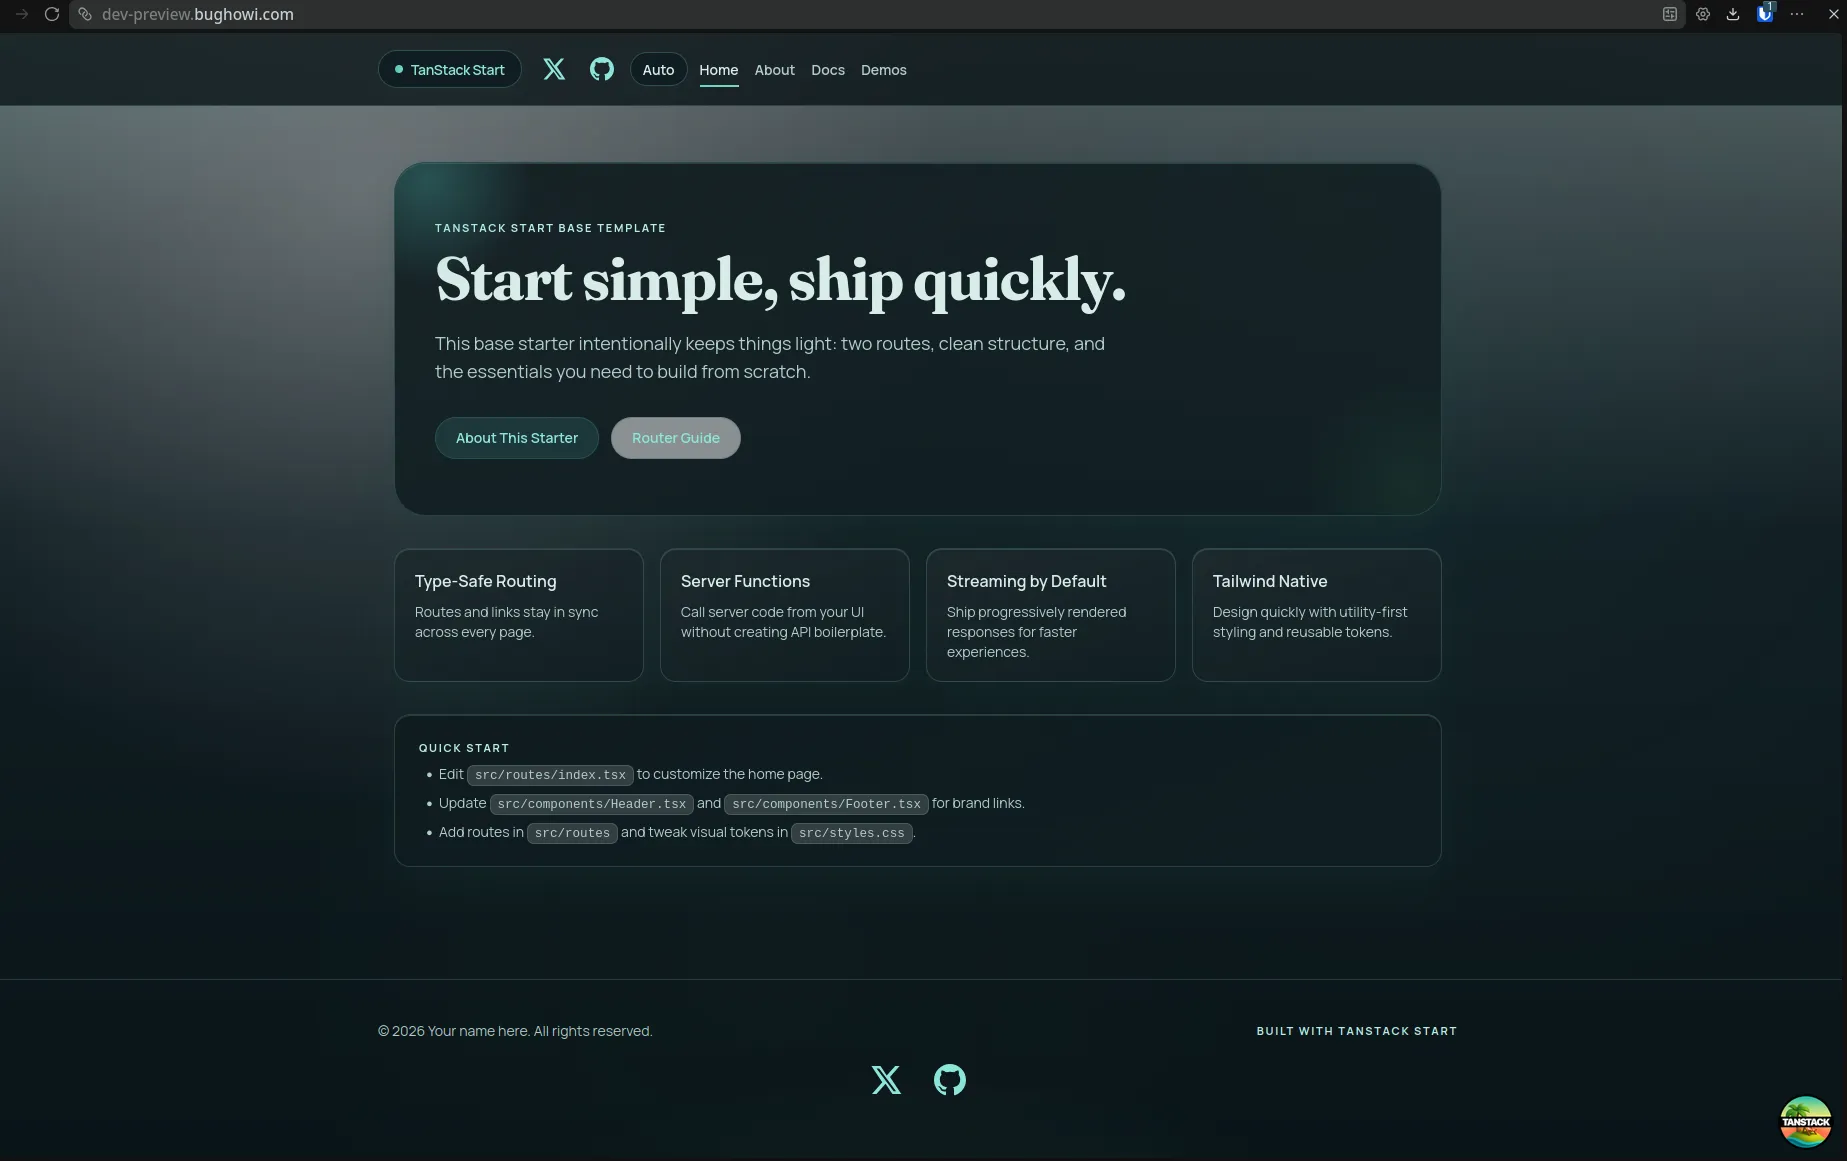
Step 7: Test it
You’ll see log output in your terminal as cloudflared connects to Cloudflare’s network. Once the connection is established, head back to the Cloudflare dashboard. Your tunnel status should now show as Ready.
Make sure your local dev server is running (e.g., npm run dev on port 3000), then open your browser and navigate to the public URL you configured:
https://dev.yourdomain.comIf everything is set up correctly, you’ll see your local application served over a public HTTPS URL. Complete with a valid SSL certificate provided by Cloudflare. You can now share this URL with teammates, clients, or use it as a webhook endpoint in third-party services.
Troubleshooting tips
- Tunnel shows as inactive: Make sure
cloudflaredis actively running in your terminal. If you closed the terminal window, the tunnel has stopped. Re-run the command to bring it back up. - 502 Bad Gateway: This usually means
cloudflaredis connected but your local dev server isn’t running. Start your app first, then check the URL again. - DNS not resolving yet: After completing the setup, DNS propagation can take a few minutes. Try again shortly, or clear your browser’s DNS cache.
- Wrong port: Double-check that the port in your tunnel configuration (e.g.,
localhost:3000) matches the port your app is actually listening on. - Vite Blocked Request: Vite restricts requests from unknown hosts by default, so if your app is powered by Vite, add your tunnel’s public URL to
server.allowedHostsinvite.config.jsto fix this.
Wrapping up
Cloudflare Tunnel is one of the cleanest ways to share a local development server publicly. No port forwarding, no firewall rules, no VPN. Just a lightweight daemon and your existing Cloudflare domain. It’s especially useful for rapid feedback loops with teammates or testing integrations that require a publicly reachable endpoint.
When you’re done sharing, simply stop cloudflared with Ctrl+C and your localhost goes back to being private.