In this tutorial, we will learn how to use React Hook Form and Yup to build forms in a React application. We will cover how to set up React Hook Form, add Yup validation, customize error messages, and perform asynchronous validation. We will also learn how to manage arrays of fields with useFieldArray and watch form values with useWatch. By the end of this tutorial, you will have a good understanding of how to build robust and user-friendly forms in React.
Introduction to React Hook Form
React Hook Form is a powerful tool for building forms in React applications. It utilizes the power of React hooks to provide a straightforward and intuitive way to handle form state and validation. One way to add validation to a form built with React Hook Form is by using the Yup library.
Setting up React Hook Form
To get started with React Hook Form, you will first need to install it in your project.
npm install react-hook-formThen, you can import the useForm hook from the react-hook-form library and use it to create a form component. The useForm hook returns several functions that you can use to register input fields, handle form submission, and access errors. For example:
import { useForm, SubmitHandler } from "react-hook-form";
interface FormInput { firstName: string; lastName: string;}
export default function MyForm() { const { register, handleSubmit, formState: { errors }, } = useForm<FormInput>();
const onSubmit: SubmitHandler<FormInput> = (data) => console.log(data);
return ( <form onSubmit={handleSubmit(onSubmit)}> <input {...register("firstName")} /> {errors.firstName && <span>This field is required</span>} <input {...register("lastName")} /> {errors.lastName && <span>This field is required</span>} <input type="submit" /> </form> );}Adding Yup validation to React Hook Form
To add Yup validation to this form, you will need to install the Yup library:
npm install @hookform/resolvers yupThen, you can use the resolver option of the useForm hook to specify a Yup validation schema for your form. The validation schema is an object that defines the rules for each field in your form. For example:
import { useForm, SubmitHandler } from "react-hook-form";import { yupResolver } from "@hookform/resolvers/yup";import * as yup from "yup";
interface FormInput { firstName: string; lastName: string;}
const validationSchema = yup.object().shape({ firstName: yup.string().required("First name is required"), lastName: yup.string().required("Last name is required"),});
export default function MyForm() { const { register, handleSubmit, formState: { errors }, } = useForm<FormInput>({ resolver: yupResolver(validationSchema), });
const onSubmit: SubmitHandler<FormInput> = (data) => console.log(data);
return ( <form onSubmit={handleSubmit(onSubmit)} style={{ display: "flex", flexDirection: "column", gap: 4 }} > <div style={{ display: "flex", flexDirection: "row", gap: 3 }}> <label>firstName</label> <input {...register("firstName")} /> {errors.firstName && <span>This field is required</span>} </div> <div style={{ display: "flex", flexDirection: "row", gap: 3 }}> <label>lastName</label> <input {...register("lastName")} /> {errors.lastName && <span>This field is required</span>} </div>
<input type="submit" /> </form> );}In this example, we are using the required function from Yup to specify that the first name and last name fields are required. If the user tries to submit the form with these fields empty, the corresponding error messages will be displayed.

Yup also provides a range of other functions for defining validation rules. For example, you can use the min function to specify a minimum length for a string field, or the max function to specify a maximum length. You can also use the email function to ensure that a field contains a valid email address.
Customizing error messages with Yup
One of the benefits of using Yup for form validation is that it allows you to customize the error messages that are displayed to the user. You can do this by specifying a string as the second argument to the required function, or by using the message function to specify a custom error message. Here is an example of how to customize the error messages for the first name and last name fields in the previous example:
const validationSchema = yup.object().shape({ firstName: yup .string() .required("First name is required") .min(2, "First name must be at least 2 characters long"), lastName: yup .string() .required("Last name is required") .min(2, "Last name must be at least 2 characters long"),});In this example, we are using the min function to specify that the first name and last name fields must be at least 2 characters long. If the user tries to submit the form with shorter values in these fields, the corresponding error messages will be displayed.
Using Async/Await with Yup and React Hook Form
Sometimes, you may need to perform asynchronous validation with Yup. For example, you may want to check if a username is already taken when a user is trying to sign up for your app. To do this, you can use the test function in your Yup validation schema, and use the await keyword to perform asynchronous validation. Here is an example of how to do this:
const validationSchema = yup.object().shape({ username: yup .string() .required("Username is required") .test( "username-unique", "This username is already taken", async (value) => { const isUnique = await checkUsernameAvailability(value); return isUnique; }, ),});In this example, the checkUsernameAvailability function is an async function that checks if a given username is available. If the username is already taken, the test function will return an error with the message “This username is already taken”.
Managing arrays of fields with useFieldArray
Another useful feature of React Hook Form is the useFieldArray hook, which allows you to manage a list of fields that have similar names. This is particularly useful when you have a form with multiple items, such as a list of products in an e-commerce app.
To use useFieldArray, you will need to import it from the react-hook-form library and pass it the name of the field array that you want to manage. The hook returns several functions that you can use to add, remove, and modify the fields in the array. Here is an example of how to use useFieldArray:
import { useFieldArray, useForm } from "react-hook-form";
type Product = { name: string; price: string;};
interface MyFormInput { products: Product[];}
export default function MyForm() { const { register, control, handleSubmit } = useForm<MyFormInput>(); const { fields, append, remove } = useFieldArray({ control, name: "products", });
const onSubmit = (data: MyFormInput) => { console.log(data); };
return ( <form onSubmit={handleSubmit(onSubmit)}> {fields.map((item, index) => ( <div key={item.id}> <input {...register(`products.${index}.name`)} /> <input {...register(`products.${index}.price`)} /> <button type="button" onClick={() => remove(index)}> Remove </button> </div> ))} <button type="button" onClick={() => append({ name: "", price: "" })}> Add product </button> <input type="submit" /> </form> );}In this example, we are using useFieldArray to manage a list of product fields, each with a name and a price. The append function is used to add new fields to the array, and the remove function is used to remove fields from the array. The fields array contains the current list of fields, and we are using the map function to render each field as a form input.

For more details about the above example, you can see it from codesandbox below
Watching form values with useWatch
Another useful feature of React Hook Form is the useWatch hook, which allows you to watch the value of a specific form field or form data. This is useful when you want to perform some action based on the value of a field, such as showing or hiding a component.
To use useWatch, you will need to import it from the react-hook-form library and pass it the name of the field or form data that you want to watch. The hook returns the current value of the field or form data. Here is an example of how to use useWatch:
import { useForm, useWatch } from "react-hook-form";
export default function MyForm() { const { register, handleSubmit, control } = useForm(); const password = useWatch({ control, name: "password" });
const onSubmit = (data: any) => { console.log(data); };
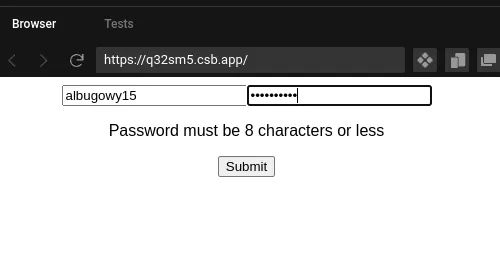
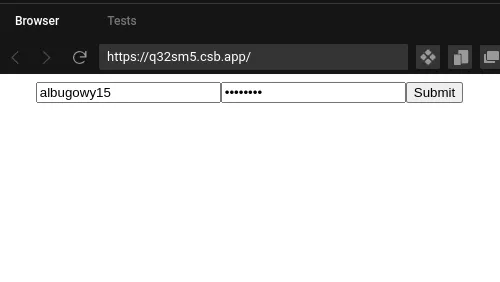
return ( <form onSubmit={handleSubmit(onSubmit)}> <input {...register("username")} /> <input type="password" {...register("password")} /> {password && password.length > 8 && ( <p>Password must be 8 characters or less</p> )} <input type="submit" /> </form> );}In this example, we are using useWatch to watch the value of the password field. We are using the password value to show a warning message if the password is longer than 8 characters.
Wrapping up
In summary, React Hook Form and Yup are great tools for building forms in React applications. They provide a simple and expressive way to handle form state and validation, and allow you to customize error messages and perform asynchronous validation. By combining these two libraries, you can build robust and user-friendly forms for your React app.